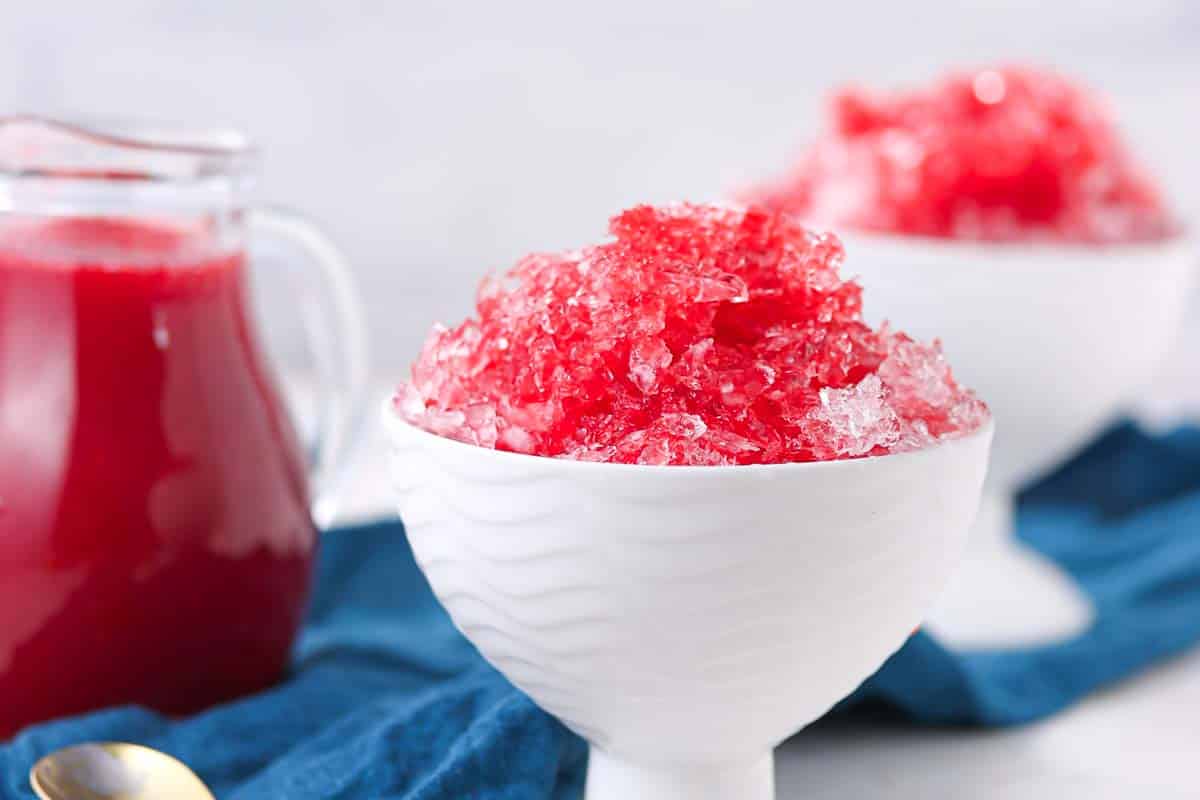
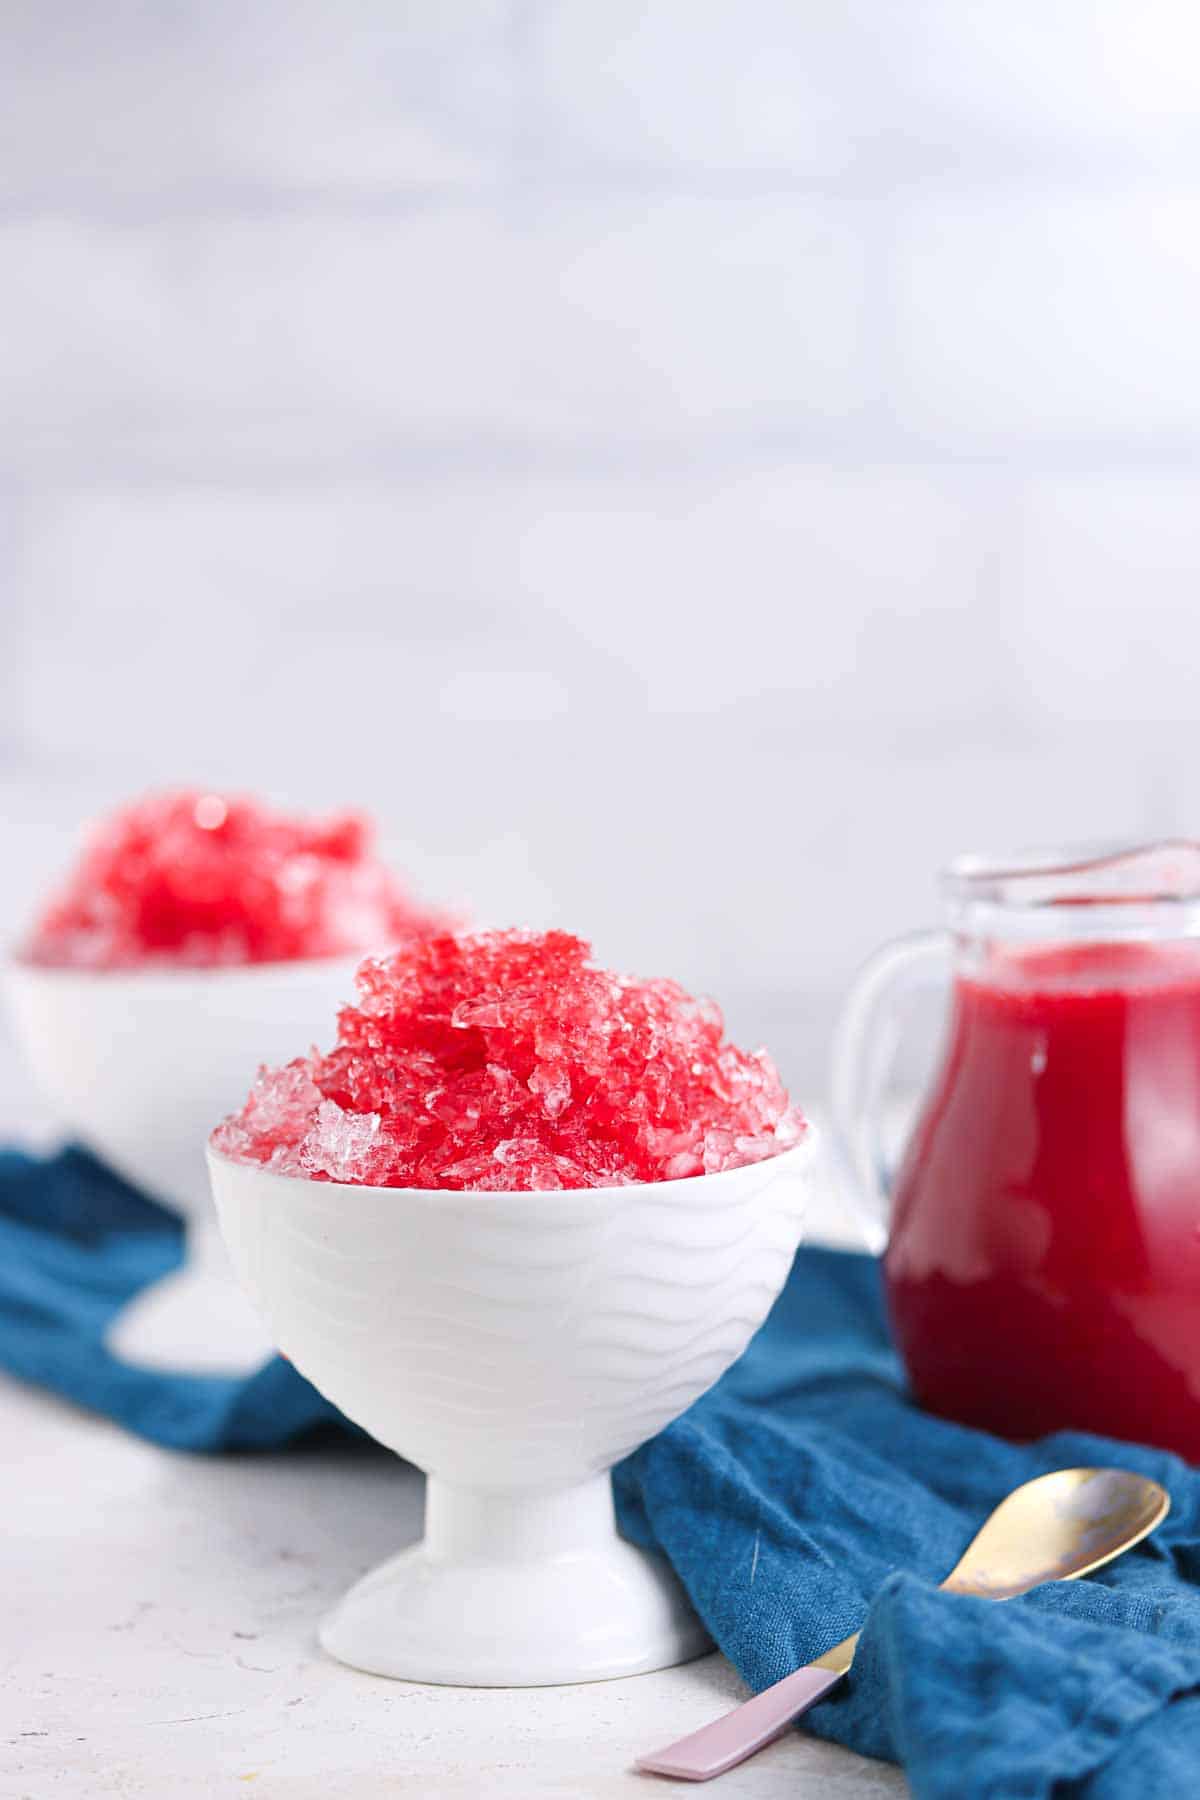
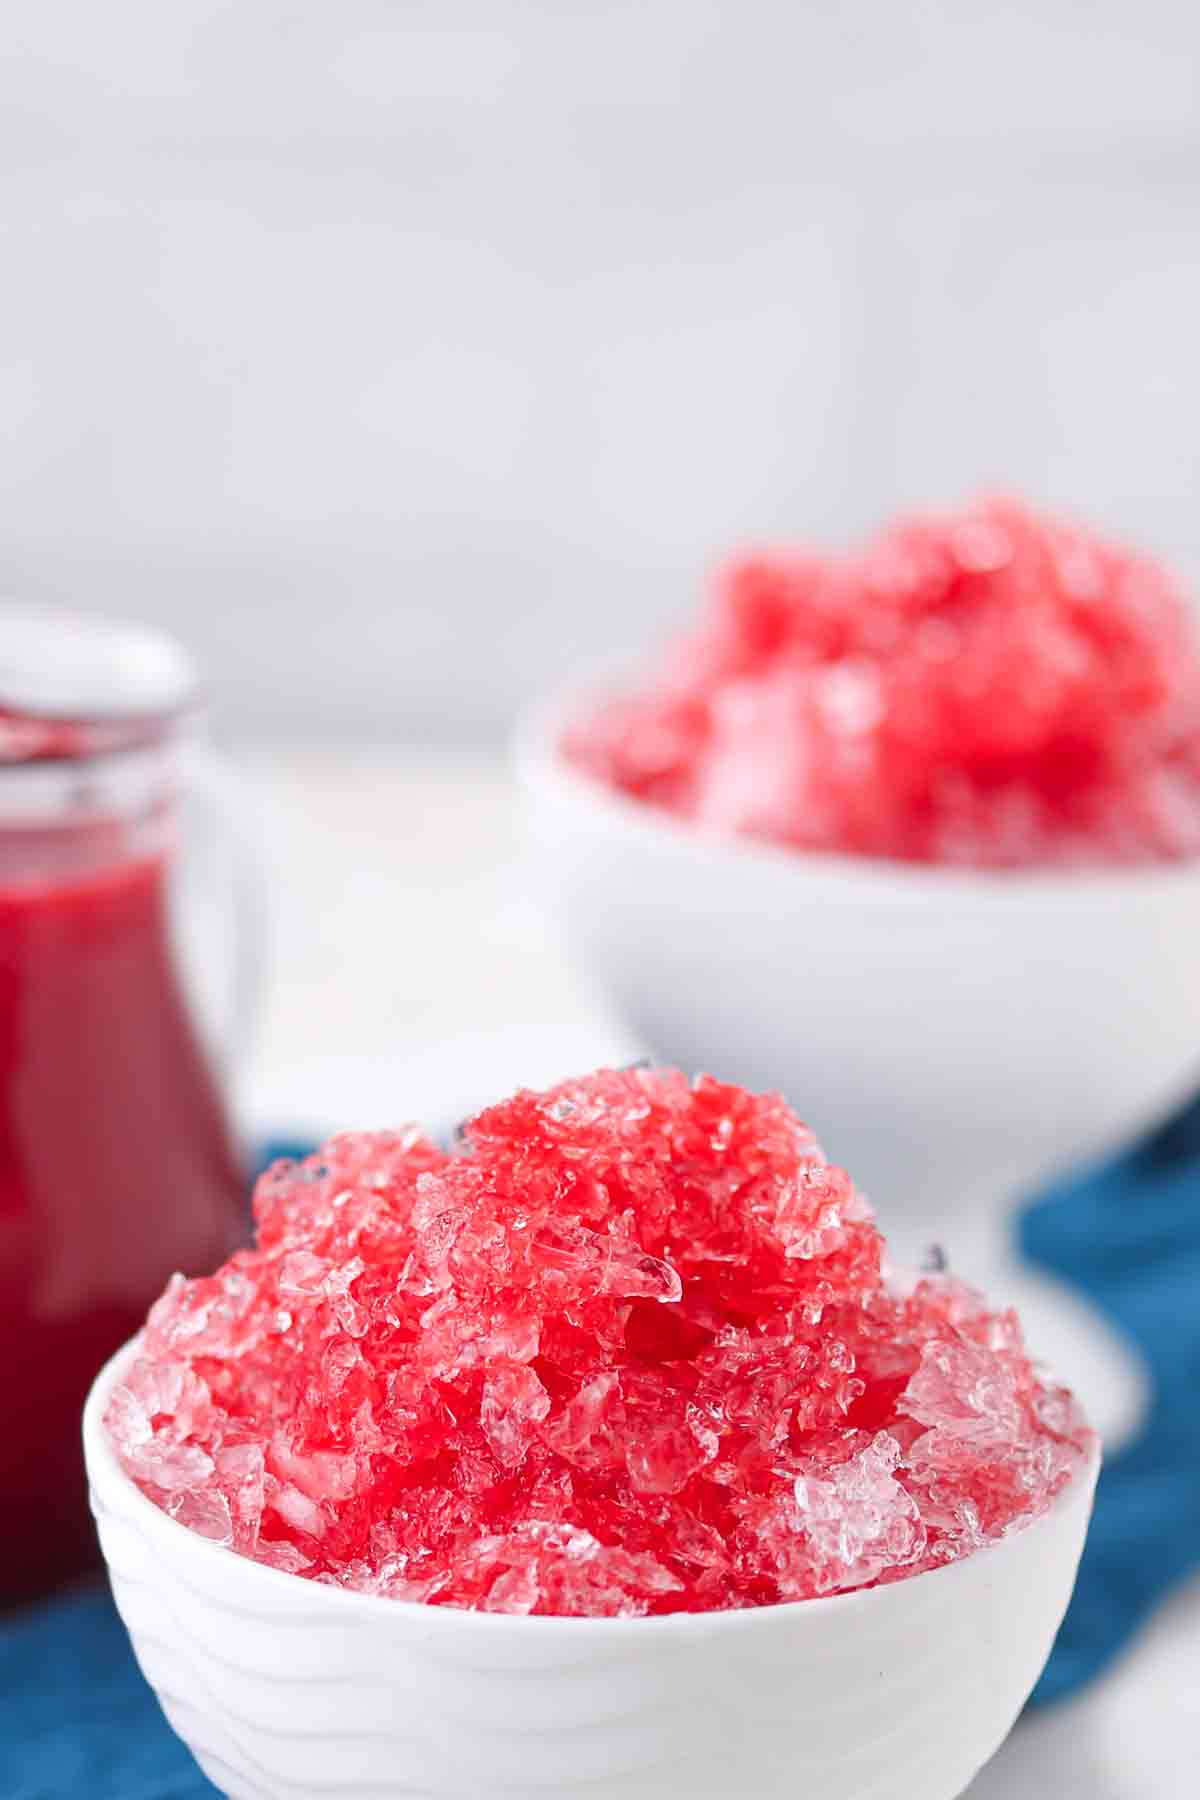
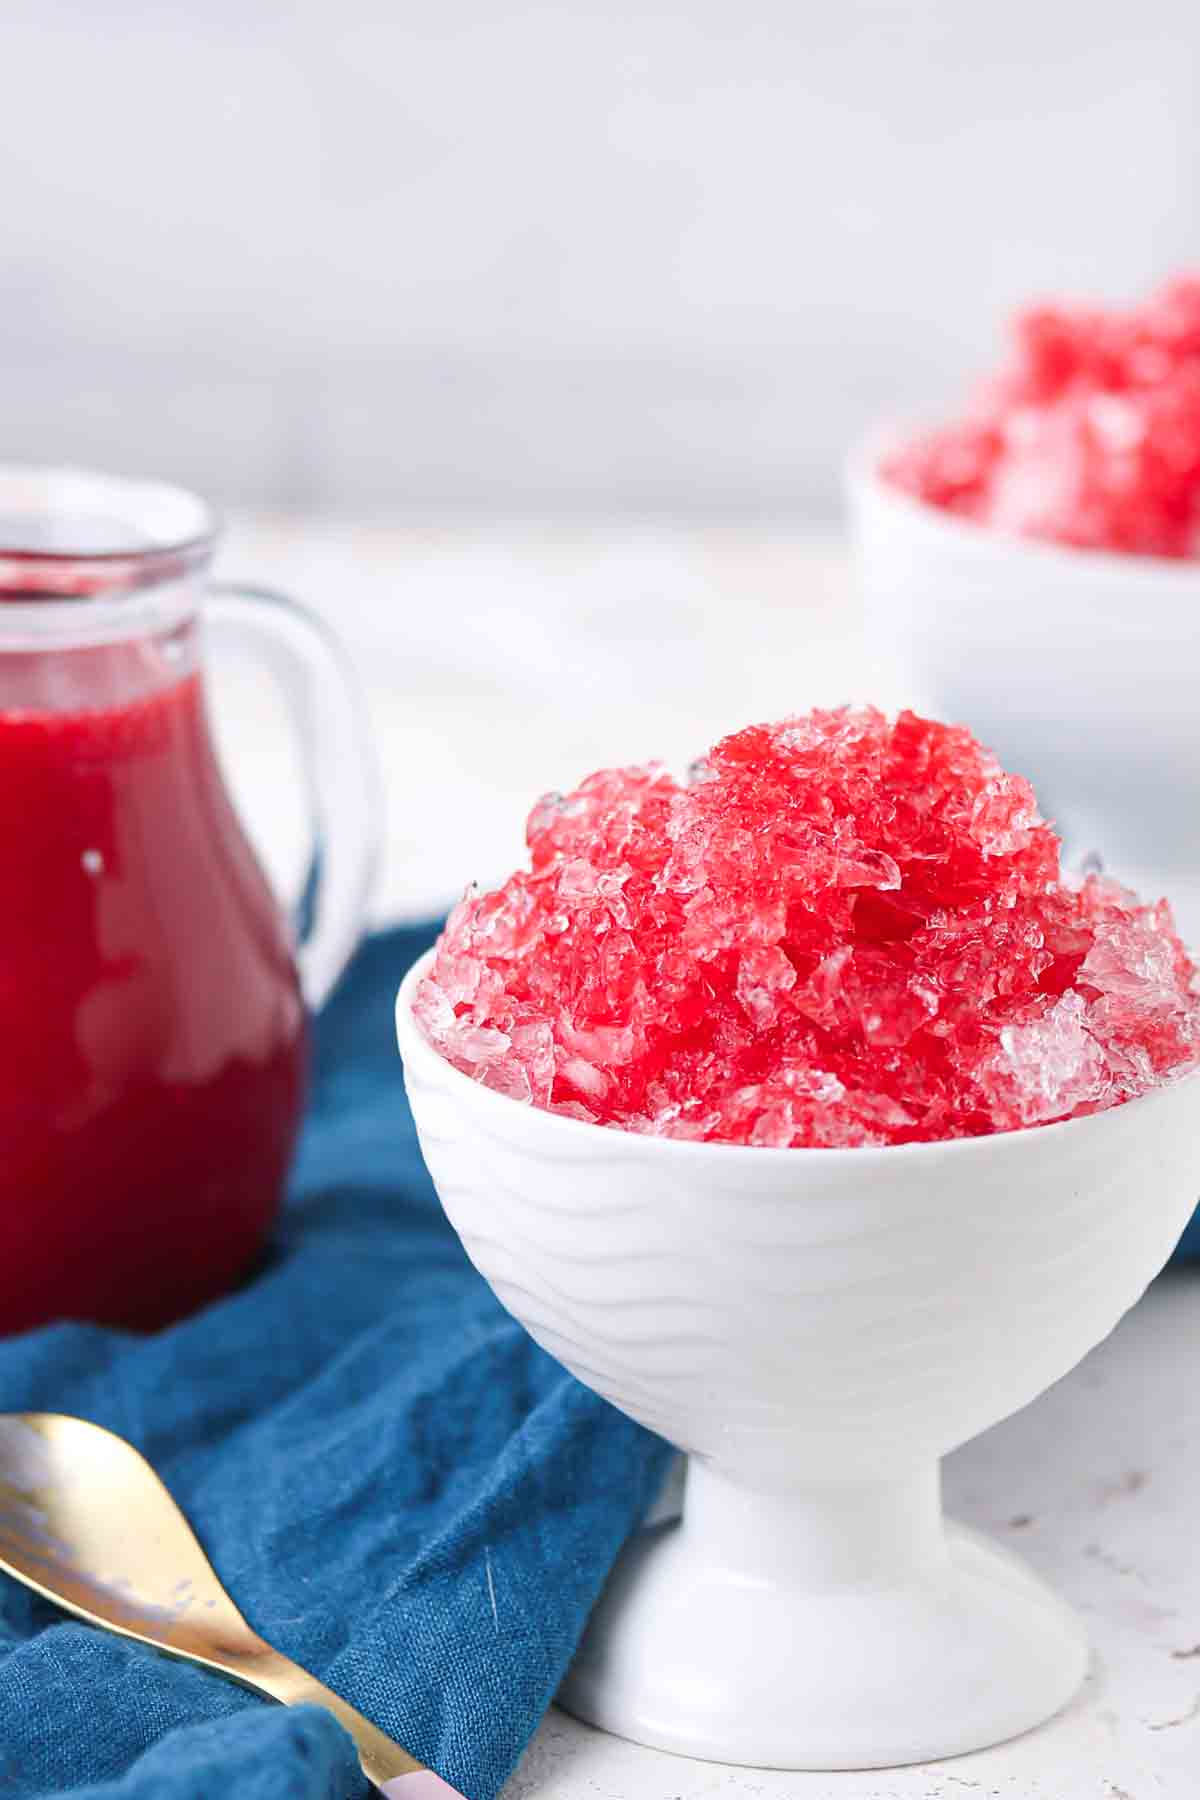
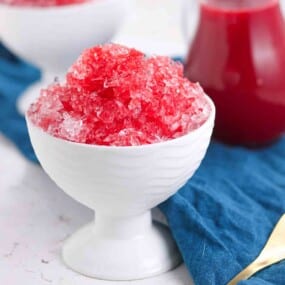
This berry shaved ice is the cold dessert I make on the hottest summer afternoons when I want something icy, fruity, and sweet without reaching for a store-bought syrup loaded with artificial color and corn sweetener. The raspberry syrup pours deep red over the ice, the flavor is clean and bright, and it comes together from four real ingredients.
I served this on a Saturday when the heat was sitting heavy, and nobody wanted to be inside. I made the syrup that morning, let it cool while we were out, and by the time we needed something cold, it was ready to pour over crushed ice in glasses. Nobody asked for a snow cone from a truck after that.

Real Syrup, Not a Bottle
The syrup in this recipe is made by simmering fresh raspberries with lemon juice and stevia powder until the flavor concentrates into something far deeper than any store-bought shave ice syrup can deliver. No artificial colors, no corn sweetener, and no preservatives mean the finished shaved ice tastes like actual fruit rather than a processed version. Agua de Jamaica iced tea and lavender mocktail all use the same homemade approach and are worth keeping in your summer drink and dessert alongside this one.
More Than Just a Snow Cone
This berry shaved ice works as a cold dessert served in a bowl or glass, but it also works beautifully as a topping over a scoop of ice cream when you want something between a classic shave ice and a full dessert. The syrup is flexible enough to use in multiple recipes, and one batch covers several servings with enough left over to store in the fridge for the rest of the week. Some recipes that work just as well as a summer dessert topping, my blueberries in dark chocolate, chocolate nut clusters, and no sugar apricot preserves are all worth having ready in the fridge or pantry at the same time.
How To Make Shaved Ice Dessert
Only a few ingredients are all it takes to have a batch of deep ruby syrup ready to pour over ice any time the heat calls for something cold and genuinely sweet.
Kitchen Gadgets:
- Small Pot: Holds the raspberries, water, lemon juice, and stevia powder while they simmer down into a concentrated berry syrup.
- Fork or Potato Masher: Crushes the raspberries as they soften, so they release all their color and flavor into the liquid during simmering.
- Hand Blender: Blitzes the simmered mixture smooth directly in the pot before straining so every last drop of flavor gets extracted cleanly.
- Fine Mesh Sieve: Strains all the seeds out after blending for a smooth, pourable syrup with no texture interruptions.
- Glasses or Bowls: Hold the shaved or crushed ice while the cooled syrup is poured generously over the top for serving.
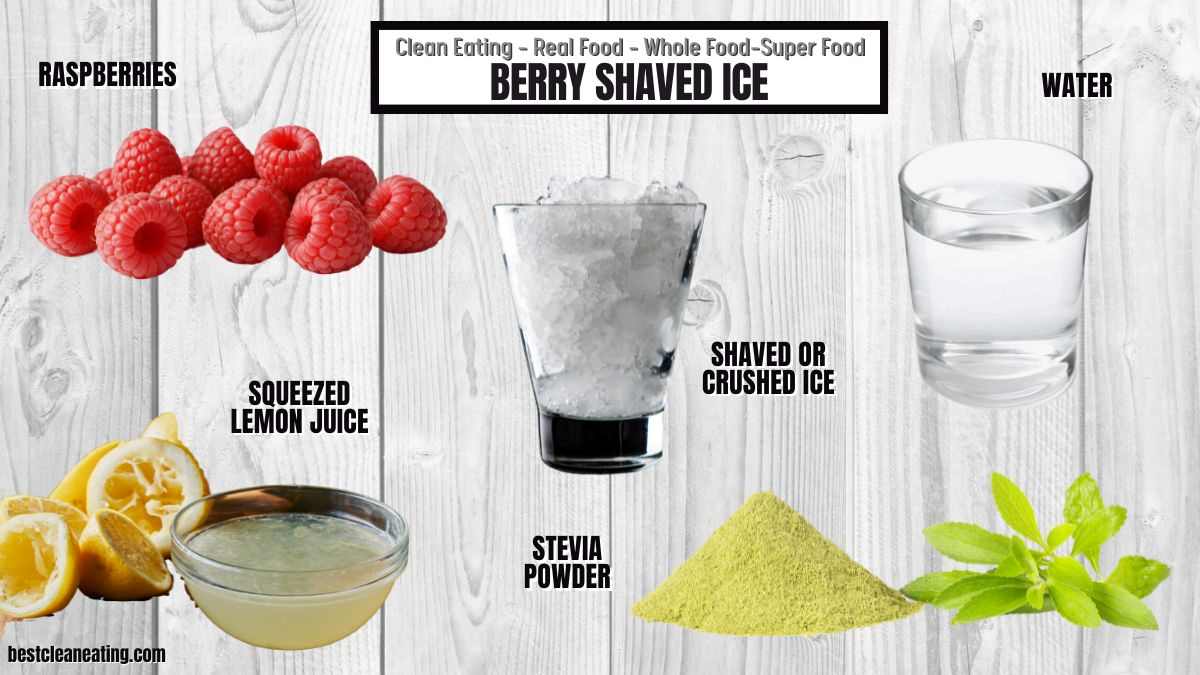
Ingredients:
- Water: Combined with the raspberries, lemon juice, and stevia in the pot to create the liquid base that carries the berry flavor through the finished syrup.
- Raspberries: Simmered in the water until they break down completely and release all their color and flavor into the liquid base.
- Lemon Juice: Added to the pot before simmering to brighten the raspberry flavor and balance the sweetness of the stevia throughout.
- Stevia Powder: Stirred into the pot with the other ingredients to sweeten the syrup cleanly without adding any processed sugar or artificial sweetener.
- Shaved or Crushed Ice: Spooned into glasses or bowls before the cooled raspberry syrup is poured generously over the top.
*Exact measurements are listed in the recipe card below.
FULL INSTRUCTIONS WITH STEPS FOR HAWAIIAN SHAVE ICE BOWL
First Step: Get Everything Ready
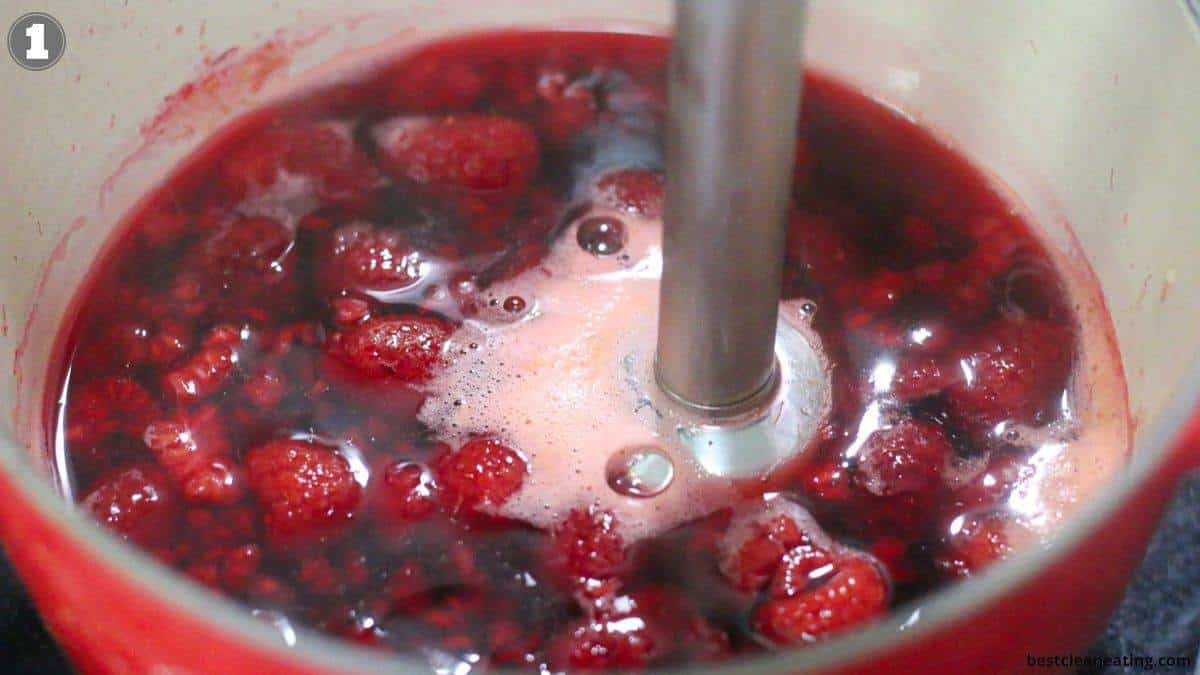
Measure out the water, raspberries, lemon juice, and stevia powder and have your pot, fork or masher, hand blender, and fine mesh sieve within reach before you start. If you are using frozen raspberries, there is no need to thaw them first, as they will soften and break down quickly once the liquid heats up. Having everything prepped before you turn on the heat keeps the whole process smooth from start to finish.
Second Step: Simmer, Blend and Strain
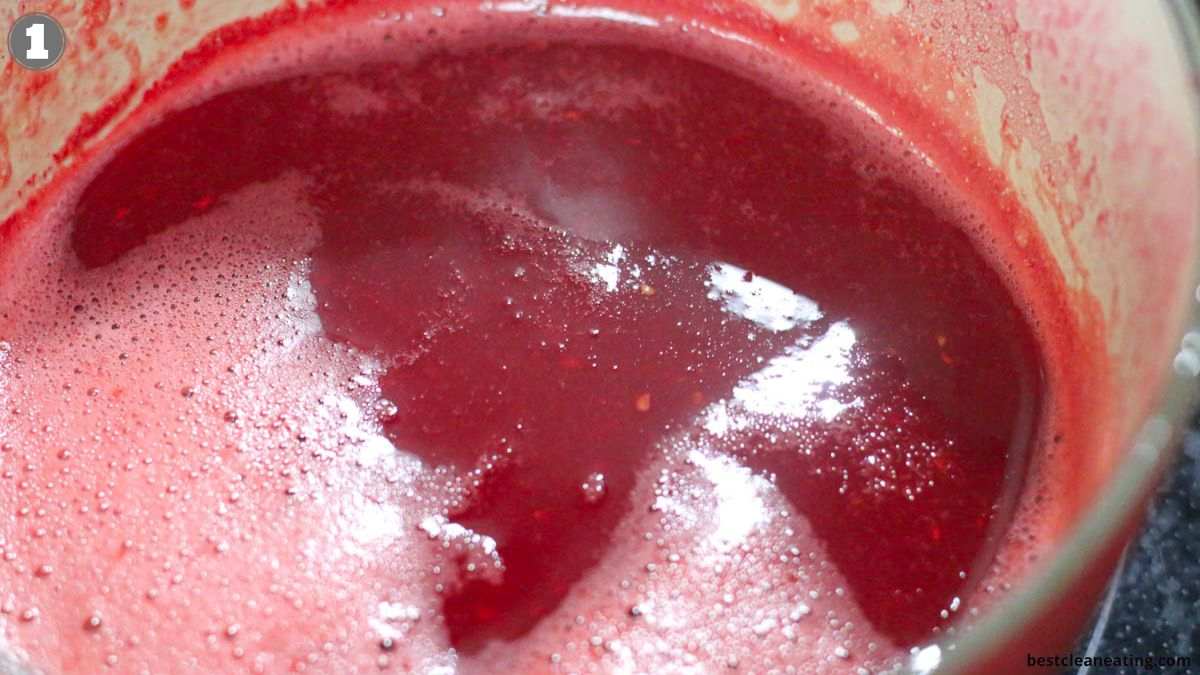
Place the water, raspberries, lemon juice, and stevia powder in the pot over medium heat and let the mixture simmer gently for 10 minutes, crushing the raspberries with a fork or potato masher as they cook down and release their color. Remove the pot from the heat and blitz directly in the pot with a hand blender for about a minute until completely smooth. Strain through a fine mesh sieve into a clean bowl, pressing gently with the back of a spoon to extract as much syrup as possible and leave the seeds behind.
Third Step: Cool and Serve
Allow the raspberry syrup to cool completely before pouring it over the ice, as pouring it warm will melt the ice too quickly and water down the flavor. Spoon the shaved or crushed ice into glasses or bowls and pour the cooled syrup generously over the top. Serve straight away while the ice is still cold and firm for the best result.
Zuzana’s Kitchen Notes:
I tested skipping the blending step and straining the simmered raspberries directly, and the yield was noticeably less syrup with a much duller color because the fruit had not broken down enough to release everything. Blending for the full minute before straining gives you a deeper, more vivid color and significantly more syrup from the same amount of fruit. For another recipe that uses the same simmer-and-strain method to build real berry flavor, my hibiscus tea follows the same approach and is worth making alongside this syrup for a full summer drinks spread.
- Use a glass bowl rather than a plastic one to cool the syrup, as glass retains the cold more evenly once you move it to the fridge.
- Press the sieve gently rather than hard to keep the syrup clear and free of any pulp that would cloud the finished color.
- Freeze leftover syrup in an ice cube tray for up to two months, so you always have a single serving ready without defrosting the whole jar.
- If you want a more textured syrup with a natural icy bite, skip the straining step and pour the unstreded syrup directly over the ice.
FREQUENTLY ASKED QUESTIONS
What to Serve With Shaved Ice Dessert?
This shaved ice pairs beautifully alongside a glass of lavender tea for a full summer spread that keeps everything light and refreshing. It also works well served next to a plate of almond horn cookies and raspberry jelly when you want something small with the cold, icy dessert. For a complete summer dessert table, serve it with a cone of strawberry and vanilla ice cream.
Store the cooled syrup in a sealed glass jar in the fridge for up to 5 to 6 days. The ice itself is best made fresh each time directly from the freezer, as pre-shaved ice stored in the freezer tends to clump and lose its fine texture before serving.
Can I Freeze This Dessert?
Yes. Pour the cooled syrup into an ice cube tray and freeze for up to two months. Transfer the frozen cubes to a sealed bag once solid. Each cube is approximately 2 tablespoons and thaws in minutes, making it easy to sweeten a single glass without defrosting the whole jar.
More Clean Eating Recipes
I always keep a batch of this syrup in the fridge on the same weeks I make curry chicken with onion, because having something cold and fruit-forward ready after a spiced coconut milk dinner is exactly the balance that makes a meal feel complete. Healthy chicken stir fry is another one worth making on the same day as this syrup, since both come together quickly and by the time dinner is done, dessert is already waiting in the fridge.
For a side that completes any meal before this shaved ice, my baked cabbage steaks come together in the air fryer in under 30 minutes and pair naturally with any of the chicken dinners above.
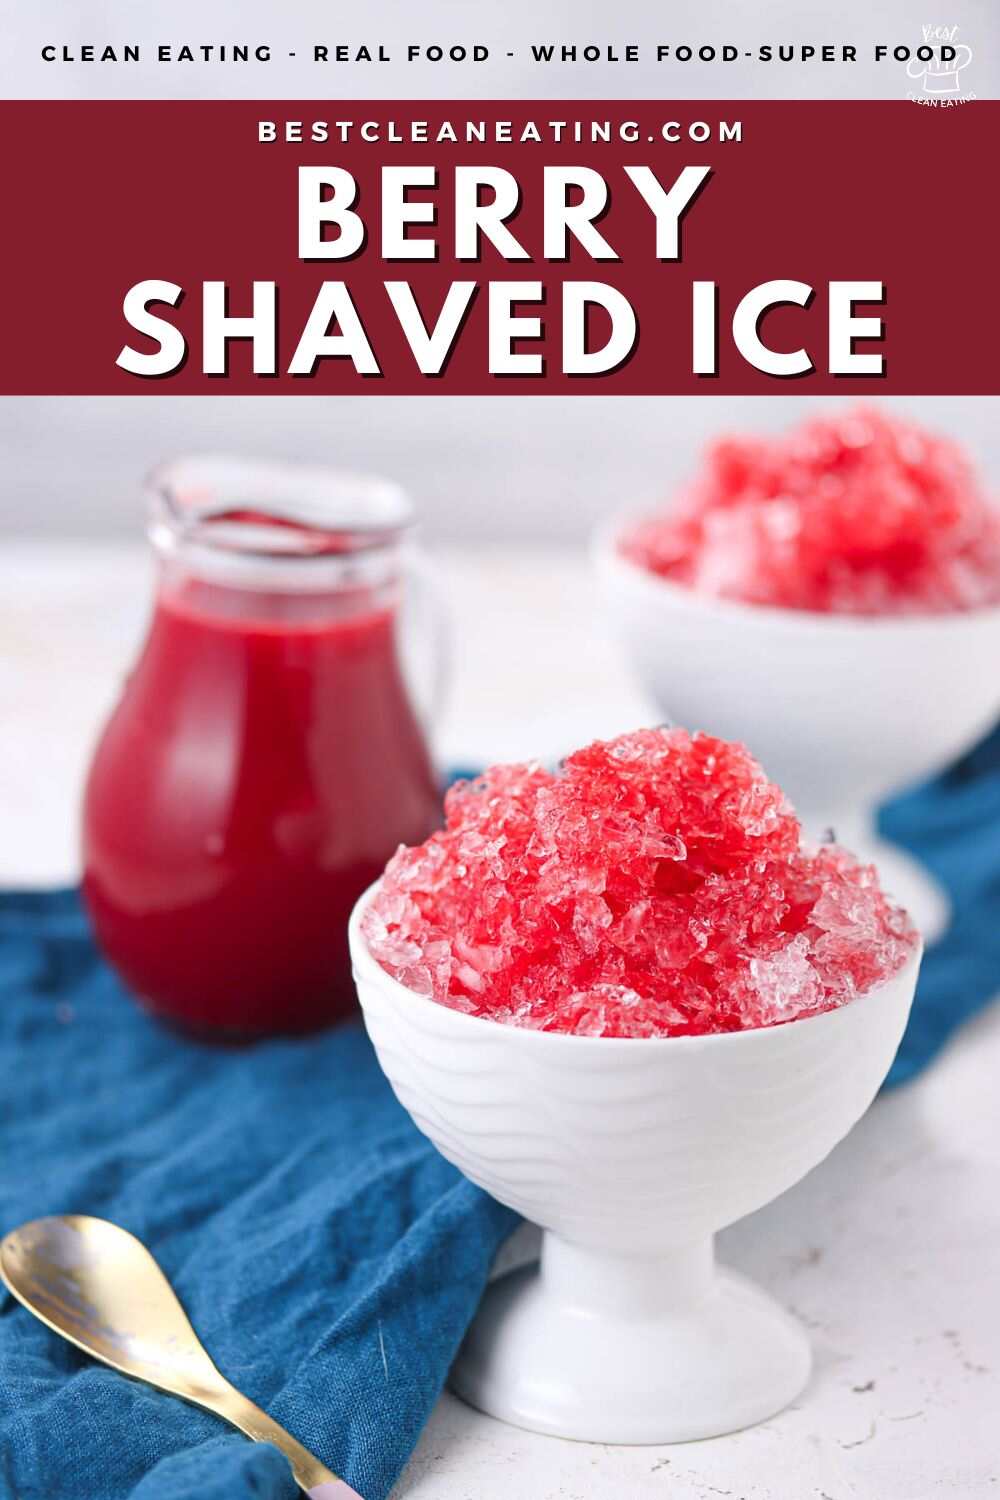
Pin For Later
Need Support or have Questions? Join our Free Facebook Group.
Follow us on Pinterest, Facebook, Instagram, TikTok, Flipboard, or YouTube.
For weekly New Recipes and a FREE E-Book get into our NEWSLETTER.
Full Recipe With a Printable Version
I would be grateful if you could give us a 5-star rating.
Berry Shaved Ice
Equipment
- 1 Small Pot
- 1 Fork or Potato Masher
- 1 Fine Mesh Sieve
- 1 Glasses or Bowls
Ingredients
- 1.5 Cups Water
- 1 Cup Raspberries fresh or frozen
- 2 Tablespoons Lemon Juice Freshly squeezed
- ½ teaspoon stevia powder
- Ice shaved or crushed, for serving
Instructions
- Measure the water, raspberries, lemon juice, and stevia, and have your pot, masher, blender, and sieve ready.
- Simmer everything for 10 minutes while crushing the berries, blend until smooth, then strain to remove seeds.
- Cool the syrup completely, pour over shaved or crushed ice, and serve immediately.
Notes
- Use a glass bowl rather than a plastic one to cool the syrup, as glass retains the cold more evenly once you move it to the fridge.
- Press the sieve gently rather than hard to keep the syrup clear and free of any pulp that would cloud the finished color.
- Freeze leftover syrup in an ice cube tray for up to two months, so you always have a single serving ready without defrosting the whole jar.
- If you want a more textured syrup with a natural icy bite, skip the straining step and pour the unstreded syrup directly over the ice.
Nutrition
Disclaimer
Please note that nutrient values are estimates only. Variations can occur due to product availability and manner of food preparation. Nutrition may vary based on methods of origin, preparation, freshness of ingredients, and other factors.
other summer dessert ideas
More dessert options can keep things fun, simple, and full of variety for any occasion. Try cakes, cookies, fruit crisps, puddings, bars, frozen treats, or no-bake desserts for easy sweet ideas.