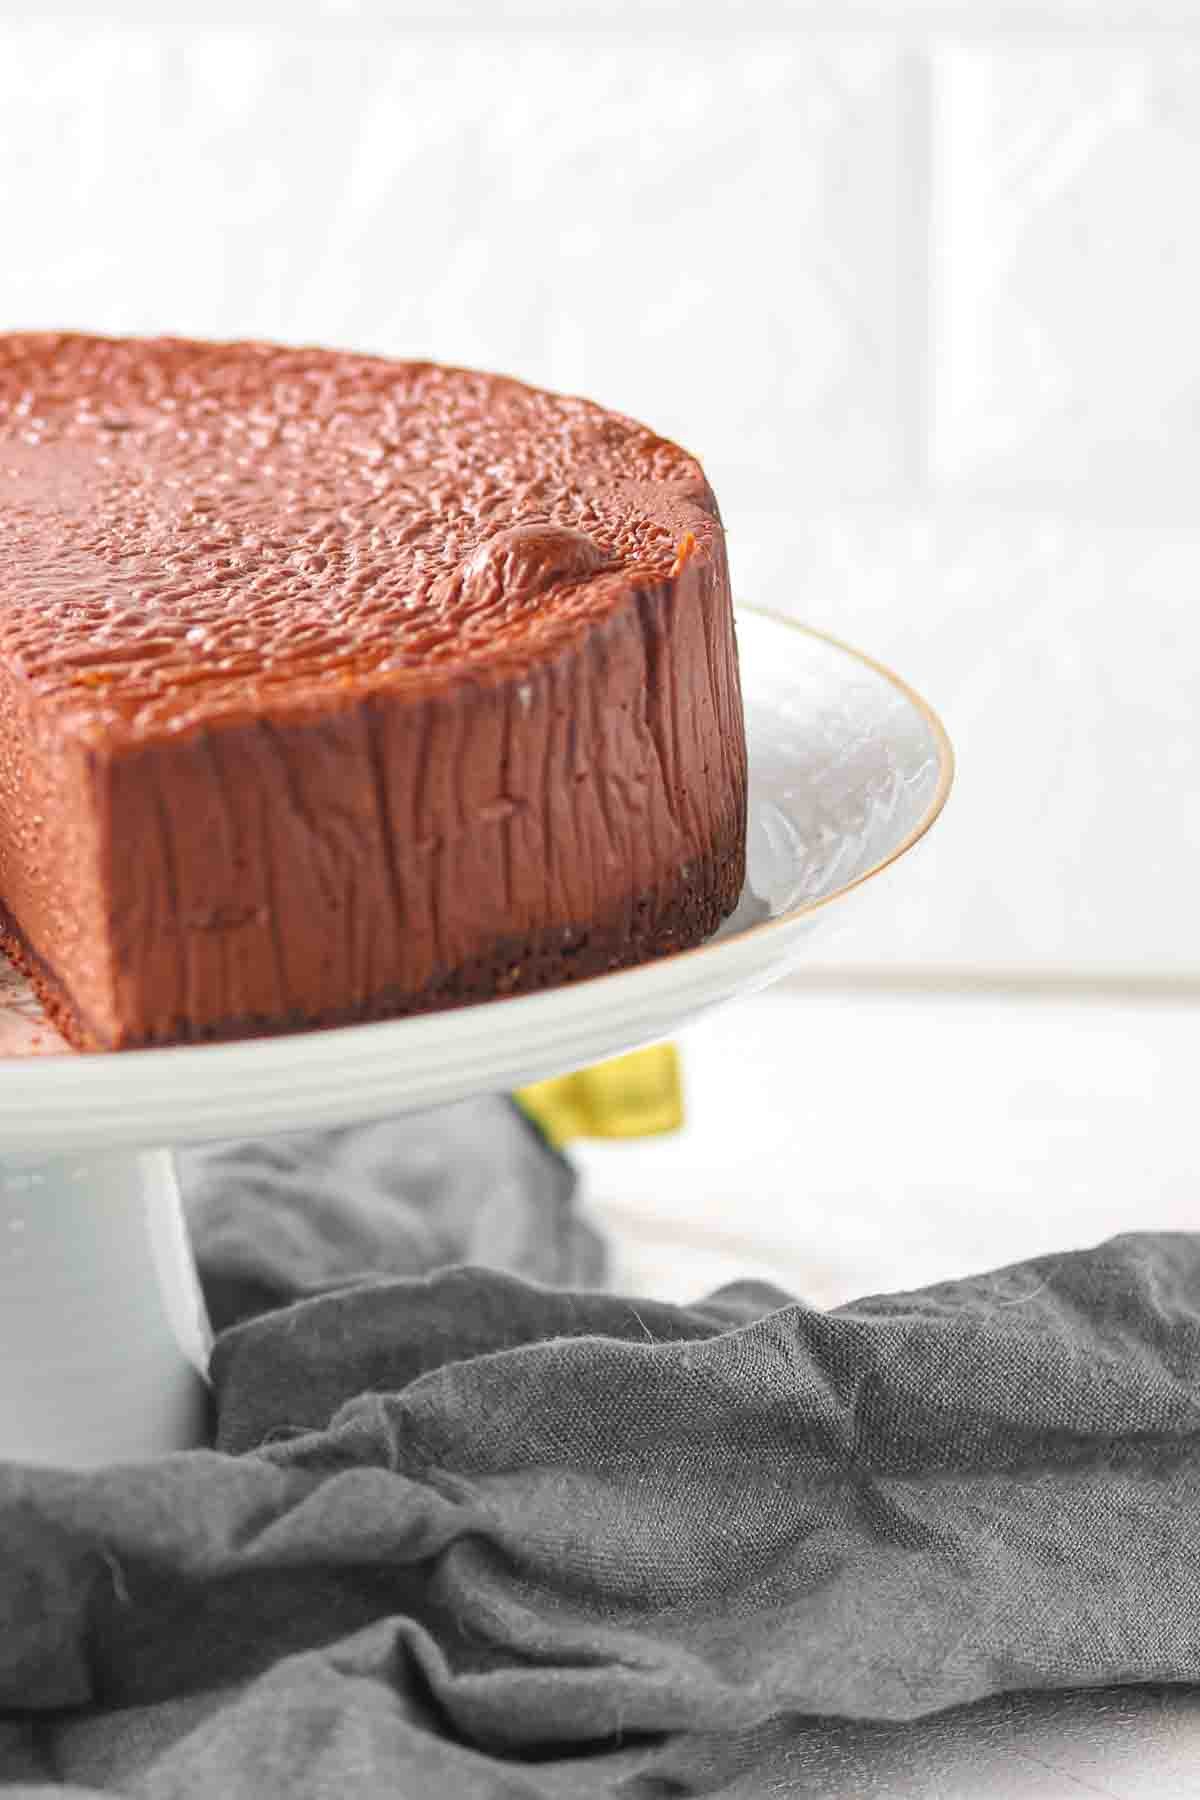
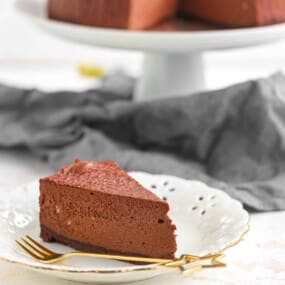
This espresso gluten-free cheesecake is the kind of dessert you make when you want a coffee-flavored dessert. Rich, deeply chocolatey, and set overnight for the cleanest slice you will get from any cheesecake recipe. It is gluten-free from the crust all the way through, with no graham crackers, no cracker crumbs, and no shortcuts that compromise the texture.

I made this for the first time because I wanted a proper cheesecake that did not rely on a graham cracker crust. A friend mentioned offhand that she could never eat it, and I took that as a challenge. The almond flour and espresso crust came together easily, and the filling was right the first try. My friend loved it more than she expected.

Room Temperature Ingredients Matter for Cheesecake Filling
Cream cheese at room temperature beats completely smooth in under two minutes, giving you a uniform batter before any other ingredient goes in. The same applies to the eggs. Cold eggs added to a room-temperature batter cause the fat in the cream cheese to seize slightly, creating a slightly grainy texture in the baked filling. Both ingredients need to be fully at room temperature before the first step of the filling begins.
Almond Flour Works Better
Almond flour mixed with cocoa powder, powdered sweetener, espresso powder, and melted coconut oil yields a pressed crust that bakes firm and pairs better with the chocolate-espresso filling than any graham cracker crust could. It is naturally gluten-free and does not need cracker crumbs or a food processor to come together. You can also make my other desserts, like gluten-free strawberry shortcake and lemon blueberry tart.
How To Make Gluten-Free Espresso Cheesecake
This gluten free cheesecake recipe uses a baked cocoa almond flour crust and a rich chocolate espresso cheesecake filling. No graham cracker crumbs and no water bath.

Kitchen Gadgets:
- Springform Pan: The correct pan for this recipe.
- Hand Mixer: Beats the cream cheese smooth and incorporates each egg into the batter without overmixing.
- Bowl: Holds the full cheesecake filling during mixing. Combines the crust ingredients before adding the coconut oil.
- Spatula: Presses the crust evenly into the pan and smooths the top of the filling before baking.
- Sieve or Sifter: Sifts the cocoa powder and espresso powder into the filling so no dry lumps carry through into the batter.
Ingredients:
For the Crust:
- Refined Coconut Oil: Melted and cooled slightly before mixing.
- Almond Flour: The gluten-free base of the crust.
- Unsweetened Cocoa Powder: Gives the crust its chocolate flavor and dark color.
- Powdered Sweetener: Binds evenly into the dry crust mixture.
- Espresso Powder: Deepens the chocolate flavor in the crust and ties it to the filling.
For the Cheesecake Filling:
- Sour Cream: Loosens the batter slightly and adds a subtle tang that cuts through the cream cheese’s richness.
- Cream Cheese: Must be fully at room temperature before it is added to the mixer.
- Unsweetened Cocoa Powder: Sifted in after the sweetener so it distributes evenly without clumping.
- Powdered Sweetener: Mixed in after the cream cheese is smooth.
- Espresso Powder: Pairs with cocoa to give the filling depth.
- Eggs: Beat just until each one disappears into the batter before adding the next.
- Heavy Whipping Cream: Streamed in after the cocoa and sweetener are combined.
*Exact measurements are listed in the recipe card below.
FULL INSTRUCTIONS WITH STEPS FOR THE BEST GLUTEN-FREE CHEESECAKE RECIPE
First Step: Take Out Your Ingredients and Prep Your Equipment
Take the cream cheese and eggs out of the fridge at least an hour before you start, so both reach room temperature. Melt the coconut oil in the microwave until completely liquid and set aside to cool. Line the springform pan with parchment paper across the base and up the sides. Fill a deep baking tray with about one inch of water and place it on the bottom rack of the oven. Preheat the oven to 350°Fahrenehit (180°Celsius.

Second Step: Make and Bake the Crust
Combine the almond flour, cocoa powder, powdered sweetener, and espresso powder in a small bowl and whisk together until evenly mixed with no dry pockets. Add the cooled, melted coconut oil and stir until the mixture resembles a rough crumble that holds together when pressed between your fingers. Spoon into the lined springform pan and press down firmly and evenly across the base using clean hands or the back of a spoon. Bake on the middle rack for 10 minutes until just set. Remove and cool while you make the filling. Reduce the oven temperature to 300°Fahrenheit (150°Celsius).

Third Step: Make the Cheesecake Filling
Beat the room-temperature cream cheese in a large bowl with a hand mixer until completely smooth, with no lumps. Add the powdered sweetener and beat until combined. Sift in the cocoa powder and espresso powder, then mix until the batter is deep-colored and uniform throughout. Stream in the heavy whipping cream and mix until completely smooth. Add the eggs one at a time, beating just until each one disappears before adding the next. Add the sour cream last and mix for around 20 seconds until the batter is just smooth. Stop as soon as it comes together.

Fourth Step: Bake, Cool, and Chill
Pour the filling over the cooled crust and smooth the surface evenly with a spatula. Transfer to the middle rack and bake for 60 minutes. The edges should look set, and the center should have a slight wobble when you gently move the pan. Remove from the oven and leave on the counter to cool for 1 to 2 hours.

Zuzana’s Kitchen Notes:
The sour cream step at the end of the filling is the one most people rush, and it is worth slowing down for. I overmixed it on the first batch, and the extra air worked into the batter caused a visible crack across the top after baking. Sour cream is added last because it loosens the batter quickly, and the filling needs as little agitation as possible from that point on to stay dense and crack-free through the bake. For another dessert that uses the same chill-before-serving step, my strawberry and vanilla ice cream is worth making at the same time and serving alongside a slice.
- If the top of your cheesecake cracks despite using a steam tray, it usually means the oven temperature was slightly too high, or the door was opened during baking. A raspberry topping or a dusting of cocoa powder covers any cracks completely without affecting the flavor.
- Springform pan leaks are common with older pans. Wrap the outside of the base in a double layer of foil before filling to catch any drips in the oven, so the water tray doesn’t make the crust wet.
- This cheesecake slices best with a sharp knife dipped in hot water and wiped clean between each cut. A cold, wet blade goes through the filling cleanly, without dragging or crumbling the crust at the edge.
- The espresso powder in both the crust and filling can be reduced to one tablespoon each if you want a lighter coffee note.
FREQUENTLY ASKED QUESTIONS
What to Serve With Gluten Free Cheesecake?
If you want something alongside it, berry shaved ice adds a cold, light contrast that cuts through the filling’s richness without competing with the espresso flavor. For something to serve with coffee after the cheesecake, the almond horn cookies are a clean, simple bite that pairs well with the cheesecake’s espresso notes.
Store the cheesecake covered in the fridge. It keeps well for up to five days, and the flavor actually deepens slightly after the first day. Press plastic wrap directly onto any cut surfaces to prevent the filling from drying out at the edges. Serve cold, straight from the fridge, for the cleanest slice.

Can I Freeze Espresso Dessert?
Yes. Slice the fully set cheesecake, wrap each piece individually in plastic wrap, and transfer to a freezer-safe bag or container. It keeps for up to two months. Thaw individual slices in the fridge for three to four hours before serving. Do not thaw at room temperature, as the filling softens unevenly from the outside in.
More Clean Eating Recipes
Here are a few more clean eating desserts worth making next. Try the dark chocolate almond clusters when you want a fast, no-bake chocolate treat with just a few real ingredients. Make the peanut chocolate bar for a satisfying homemade chocolate bar that stores well and works as a snack or an after-dinner treat.
Pick up the chocolate nut clusters recipe if you want something portioned and easy to grab without slicing or plating. All three are simple, real-ingredient recipes that fit into any week.
Pin For Later

Need Support or have Questions? Join our Free Facebook Group.
Follow us on Pinterest, Facebook, Instagram, TikTok, Flipboard, or YouTube.
For weekly New Recipes and a FREE E-Book get into our NEWSLETTER.
Full Recipe With a Printable Version
I would be grateful if you could give us a 5-star rating.
Espresso Gluten Free Cheesecake
Equipment
Ingredients
For the Crust:
- 4 Tablespoons Refined Coconut Oil 60ml, melted
- 1 Cup Almond Flour
- 2 Tablespoons Unsweetened Cocoa Powder
- 2 Tablespoons Powdered Sweetener
- 1 Tablespoon Espresso Powder
For the Cheesecake Filling:
- 6 Tablespoons Sour Cream 90ml
- 16 Ounces Cream Cheese room temperature
- ½ Cup Unsweetened Cocoa Powder
- ¾ Cup Powdered Sweetener
- 2 Tablespoons Espresso Powder
- 3 Large Eggs at room temperature
- ¾ Cup Heavy Whipping Cream 180ml
Instructions
- Bring the cream cheese and eggs to room temperature, melt the coconut oil, line the pan, set a water tray in the oven, and preheat to 350°Fahrenehit (180°Celsius.
- Mix the crust ingredients, press into the pan, and bake for 10 minutes. Cool and reduce the oven to 300°Fahrenheit (150°Celsius).
- Beat the cream cheese, then mix in the sweetener, cocoa, espresso, cream, eggs, and sour cream until smooth.
- Pour the filling over the crust, bake for 60 minutes, cool 1–2 hours, then refrigerate overnight before serving.
Notes
- If the top of your cheesecake cracks despite using a steam tray, it usually means the oven temperature was slightly too high, or the door was opened during baking. A raspberry topping or a dusting of cocoa powder covers any cracks completely without affecting the flavor.
- Springform pan leaks are common with older pans. Wrap the outside of the base in a double layer of foil before filling to catch any drips in the oven, so the water tray doesn’t make the crust wet.
- This cheesecake slices best with a sharp knife dipped in hot water and wiped clean between each cut. A cold, wet blade goes through the filling cleanly, without dragging or crumbling the crust at the edge.
- The espresso powder in both the crust and filling can be reduced to one tablespoon each if you want a lighter coffee note.
Nutrition
Disclaimer
Please note that nutrient values are estimates only. Variations can occur due to product availability and manner of food preparation. Nutrition may vary based on methods of origin, preparation, freshness of ingredients, and other factors.
other simple dessert recipes
Dessert recipes to make can add something sweet to any meal or celebration. Explore baked, chilled, creamy, fruity, frozen, or no-bake treats to enjoy a wide variety of flavors and textures.