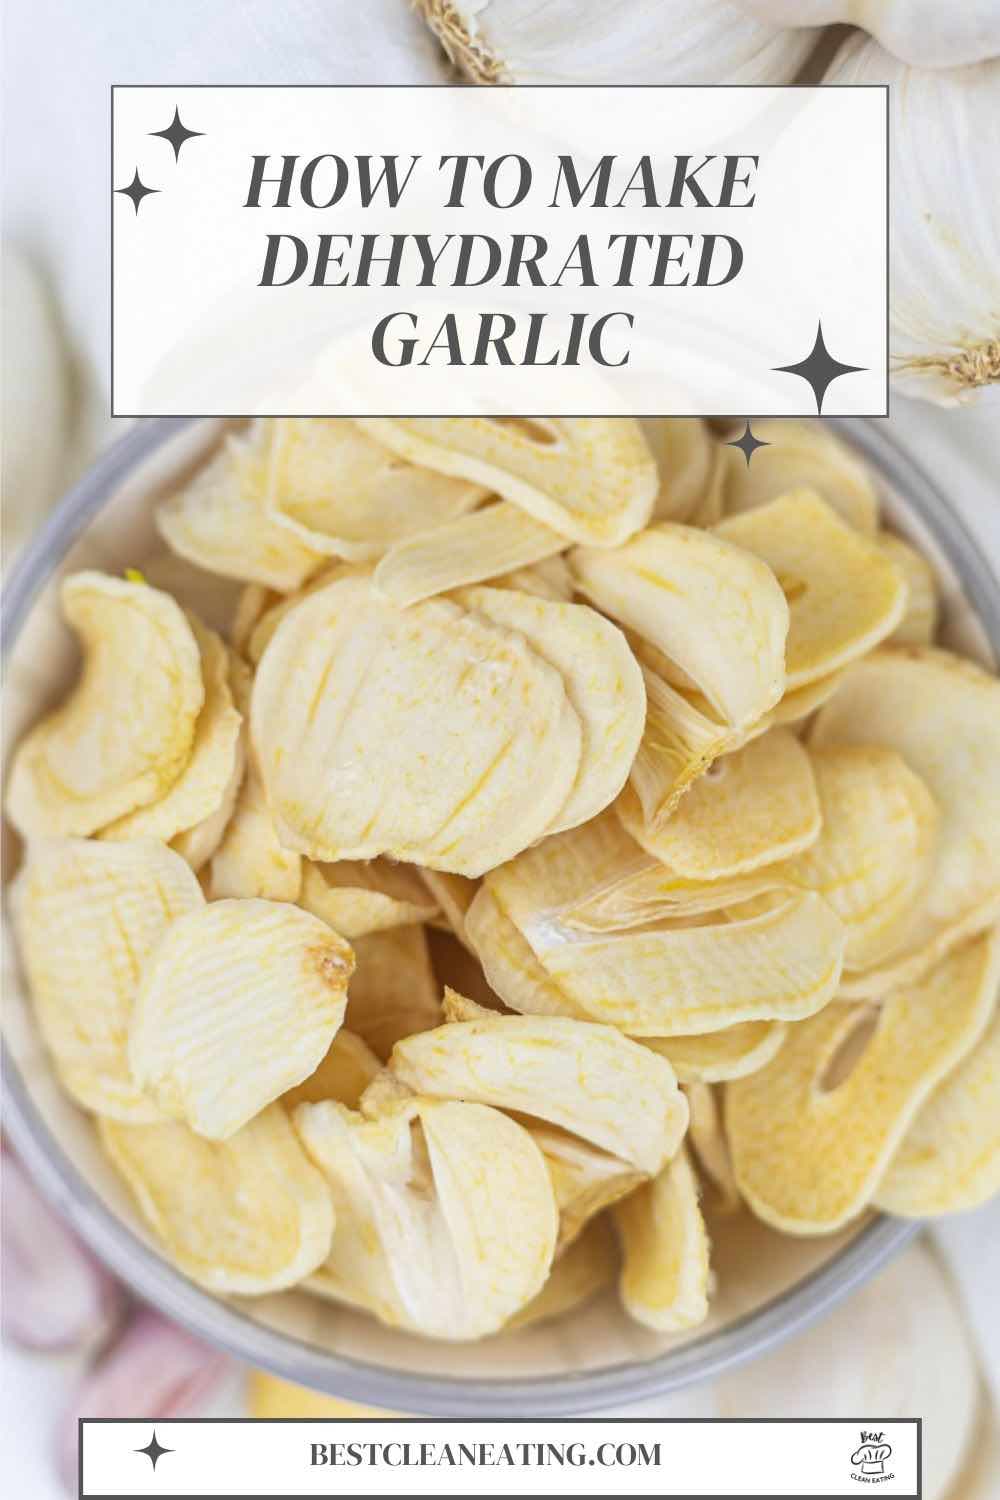
Discover how to make dehydrated garlic at home, a simple and cost-effective way to preserve your fresh garlic cloves. Skip the need to buy garlic by learning this easy method that not only extends the shelf life of your garlic but also intensifies its flavor. You only need a dehydrator to transform ordinary garlic into a versatile and long-lasting kitchen staple; you can even make homemade garlic powder from it.
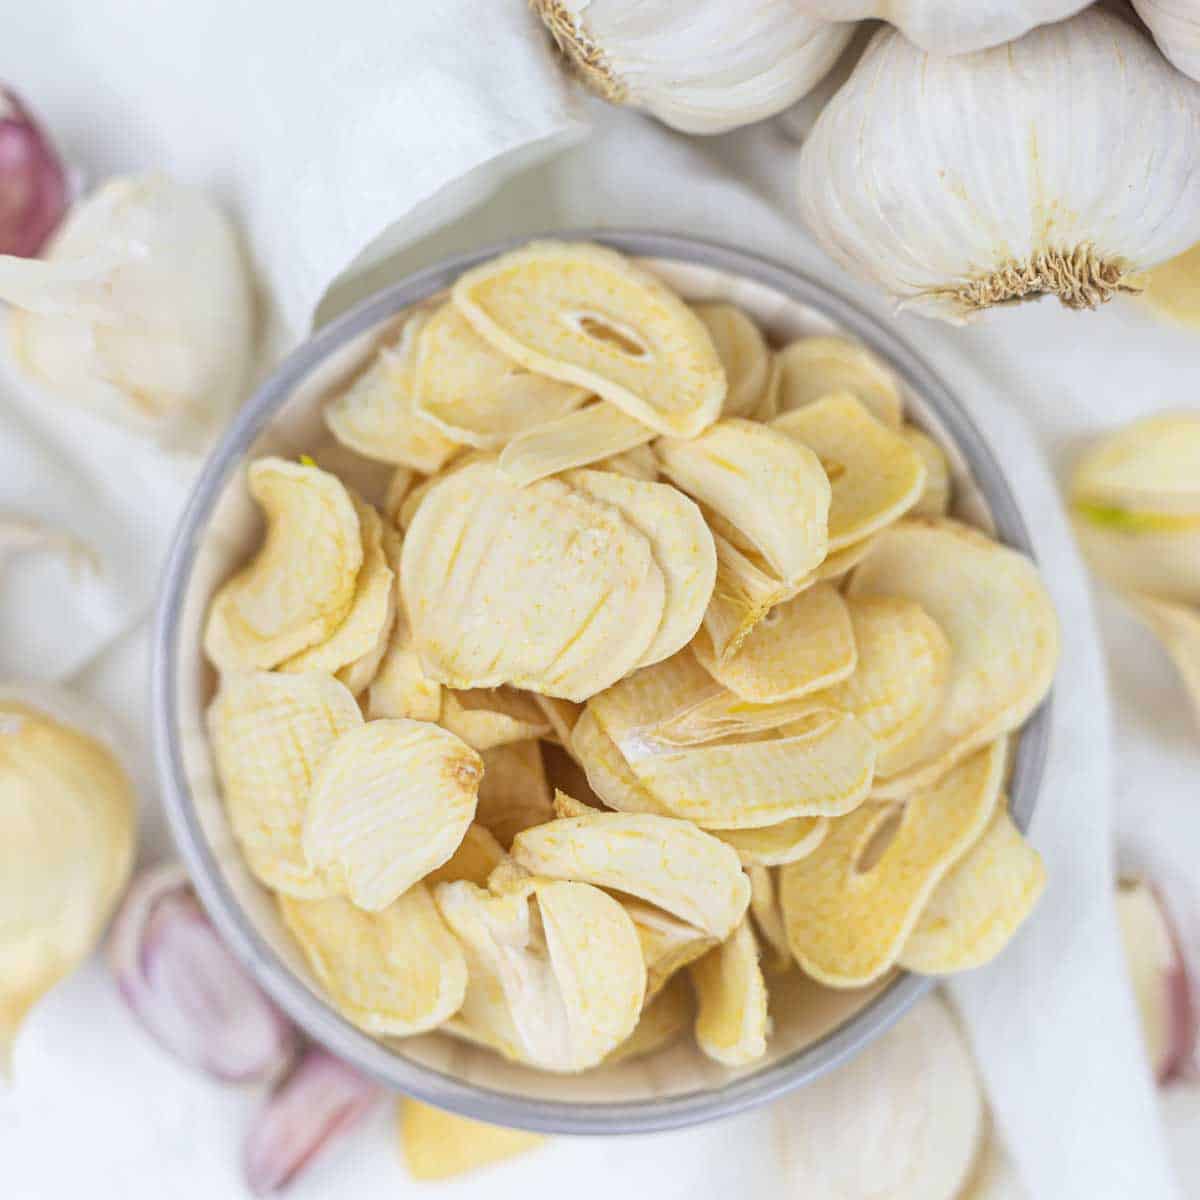
You know what? I serve this as a chips to go with our wine and cheese evenings. Out of ordinary and so delicious.

Sprinkle on your vegetable soup to add depth and rich garlic flavor to your winter meal. You can also top it on your rice dishes like these chicken stir fry and chicken roll-ups that are great for having for dinner.
Why You Will Love This Recipe
- Intense flavor – dehydrating garlic intensifies its flavor, giving you a potent ingredient that can uplift the taste of various dishes.
- Extended Shelf Life – say goodbye to concerns about garlic going bad. Dehydrating garlic extends its shelf life, allowing you to have flavor-packed seasoning on hand whenever inspiration strikes.
- Preservative-Free – when you make your dehydrated garlic, you have control over what goes into it. Say goodbye to preservatives and hello to pure, natural garlic.
Dehydrated Pantry Staples
As I have started a clean eating way of life, the dehydrator has been one of my kitchen’s greatest gadgets. I have tried many dehydrated recipes, most of which are for filling my pantry.
I made dried mushrooms for some of my stew dishes to add umami and mushroom powder for the same purpose. Since I cook a lot when free, I also stocked onion flakes in my pantry that can be turned into onion powder.
For a unique flavor, dehydrated cranberries can be used for cooking to add a little sweetness or as a snack like my other recipes, such as dried chicken, cucumbers, broccoli, tomatoes and even fruit roll-ups.

How To Grow Garlic?
Having just a tiny garden in your home or even a pot with soil, you can plant garlic cloves in well-drained soil with plenty of sunlight. Plant individual cloves with the pointed end up, water them regularly, and watch for sprouts in a few weeks.
You will know when to harvest the garlic bulbs when the leaves turn brown, and then the last thing to do is to let them dry before storing them in a cool, dark place. It seems easy, but some find it challenging, so they prefer just buying in the market.
Dehydrate Garlic And Make Garlic Powder
Dehydrating them is the most crucial part of making garlic fine powder. The process is straightforward; later, you can do it with just a blender or a coffee grinder. If you have been buying garlic powder from the stores, it is just about when you make one at home.
The best garlic powder is made at home since you can do it your way, considering your preferences. You can even try dried minced garlic for easy powdering. Not only that, you can also make a granulated garlic recipe. Just make sure to know how to use both granulated garlic and garlic powder in your dishes.
How To Make Homemade Dehydrated Garlic
Let us make this garlic recipe by following only a few simple steps. I have prepared a video for you, but you are in the right place if you want all the details.
Kitchen Gadgets:
- Dehydrator: Use it to turn your garlic into a dried flavor-packed seasoning that can last longer than having regular sliced garlic cloves at home.
- Silicone Insert: It is essential to make sure your garlic slices stay on while getting all crispy.
- Spray Bottle and Brush: This helps the dehydrator trays get a nice coating before the process so the garlic will not stick and have a perfect texture.
Ingredients:
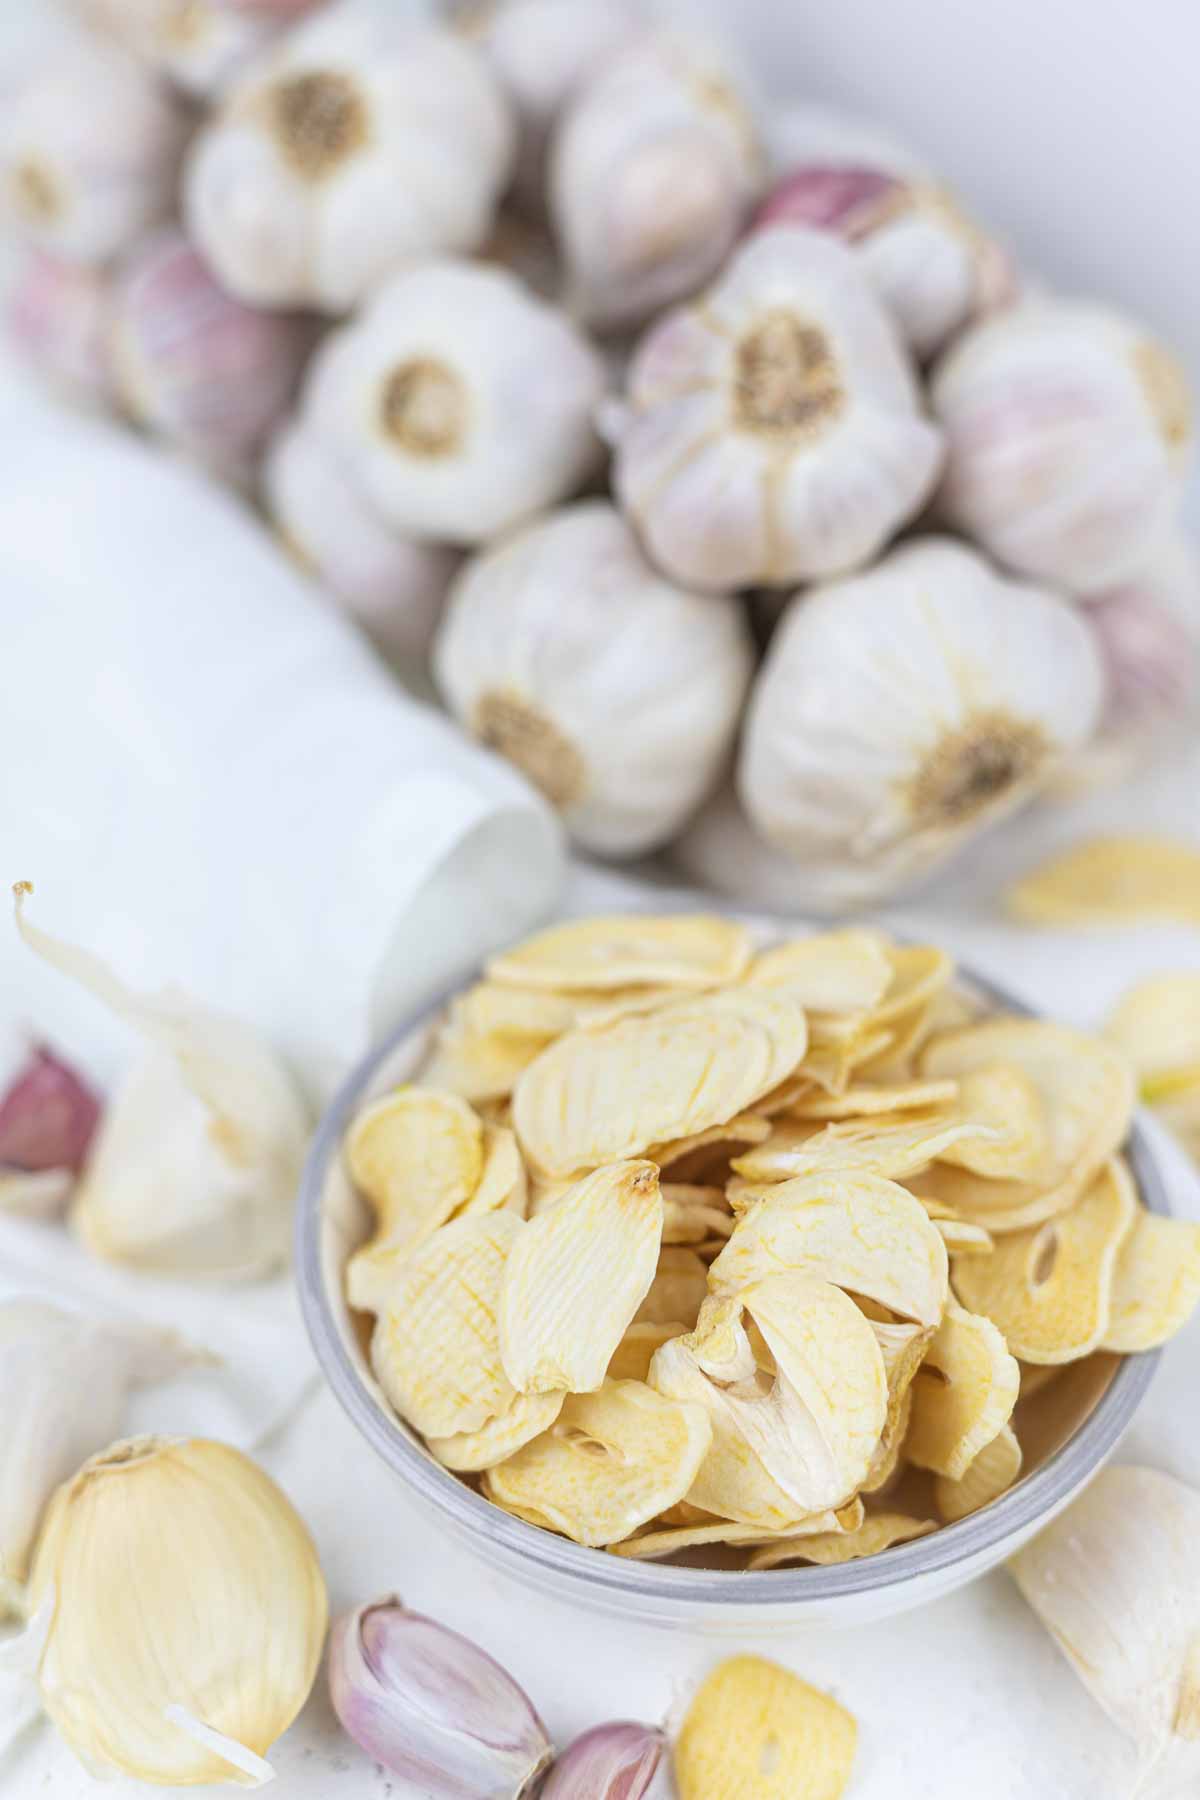
- Fresh Garlic: Look for plump and firm garlic pieces. You will know what the fresh ones are when you look into one. You can also determine it is fresh based on its smell.
- Olive Oil: Essential for making the base of the dehydrator non-stick, and it can even add a little flavor that will enhance the dehydrated whole cloves of garlic.
*Exact measurements are listed in the recipe card below.
FULL INSTRUCTIONS WITH STEPS FOR DRIED GARLIC FROM THE DEHYDRATOR
First Step: Prepare Your Garlic
The first thing to do is to peel and wash lots of garlic cloves. After ensuring they are clean and dry, slice the garlic into thin pieces and have them ready for dehydrating.
Since olive oil is only optional for this recipe, I already have mine prepared in a small spray bottle for my other recipes.

Second Step: Assemble The Garlic Slices
In this step, you can start attaching your silicone insert to your dehydrator trays if you have one. It will help assemble the garlic slices evenly without falling through the holes.
Spray a small amount of olive oil in a single layer tray layer and brush it to spread it. The purpose of the olive oil is to prevent the chopped garlic from sticking as it dries through the process.
Layer garlic slices onto a tray evenly.

Third Step: Dehydrate
Once you have assembled everything in the trays, adjust the dehydrator to a low temperature, around 158°F or 70°C and dry the garlic for 8 hours.
You will know the garlic is dried when the slices turn brittle and snap easily. Optionally, you can dry garlic in an oven, but the dehydrator is the best and easiest method for this one.

TRICKS AND TIPS:
- Season – you can season the garlic with some herbs like thyme or rosemary or just a simple salt and pepper to taste.
- Uniform slices – chop the garlic uniformly to ensure each piece dries evenly. This also guarantees a consistent texture throughout your dehydrated garlic batch.
- Check for texture – test the garlic for doneness by picking a slice and snapping it in half. If it is brittle and cracks easily, your dehydrated garlic is ready. If it bends, it needs more time in the dehydrator.
- Cool before storage – allow the garlic to cool completely before storing it. This prevents condensation inside the storage container, ensuring your dried garlic remains crispy and flavorful.
FREQUENTLY ASKED QUESTIONS
Is Making Homemade Garlic Powder Easy?
After making this recipe where we dehydrate our garlic, making your garlic powder or granulated garlic is super easy. Gather your dried garlic flakes and place them in a blender or mortar and pestle to grind until they turn to powdered garlic. It is a great way to preserve garlic at home; you can even make garlic salt from it.

What to Serve With Dried Fresh Garlic Cloves?
Dried fresh garlic cloves are a flavor-packed addition to many dishes, and here are some delightful pairings for them.
- Pasta Dishes – toss dried fresh garlic into your favorite pasta dishes for an extra savory flavor.
- Pizza – create a simple gourmet touch by topping garlic bits over your homemade pizza before baking.
- Marinades and Sauces – you can incorporate dried garlic into marinades and sauces to infuse them with a solid and fragrant garlicky flavor.
- Bread – mix them into butter or spreads for a tasty accompaniment to crusty bread or rolls.
How Do I Store Dehydrated Garlic?
After dehydrating, it is essential to let your garlic cool to room temperature to avoid moisture. Then, store the garlic in airtight containers or mason jars. This keeps their crispiness and makes sure the dried garlic doesn’t go soft.
Freezing dehydrated garlic is not recommended. Dehydrating removes moisture from the garlic, and freezing could reintroduce moisture, causing it to lose its crispiness and potentially develop a freezer burn.
More Seasoning Recipes
Discover more spice recipes to enhance your following dishes with a savory kick using these easy pantry staples. Try our Indian spices recipe, my go-to seasoning whenever I make a chicken curry dish.
Taste the richness of any Mexican dish with our enchilada spices that can be perfectly incorporated into your chicken enchiladas with a homemade enchilada sauce. Try them and perfect your following dinner dishes and weeknight meals.
Pin For Later
Need Support or have Questions? Join our Free Facebook Group.
Follow us on Pinterest, Facebook, Instagram, TikTok, Flipboard, or YouTube.
For weekly New Recipes and a FREE E-Book get into our NEWSLETTER.
Full Recipe With a Printable Version
I would be grateful if you could give us a 5-star rating.

Dehydrated Garlic
Equipment
- 1 Brush
Ingredients
- 1 Tablespoon Olive Oil
- 10 pieces Fresh Garlic Cloves
Video
Instructions
- The first thing to do is to peel and wash lots of garlic cloves. After ensuring they are clean and dry, slice the garlic into thin pieces and have them ready for dehydrating.
- Start attaching your silicone insert to your dehydrator trays. Spray a small amount of olive oil in a single layer tray layer and brush it to spread it. Layer garlic slices onto a tray evenly.
- Once you have assembled everything in the trays, adjust the dehydrator to a low temperature, around 158°F or 70°C and dry the garlic for 8 hours. You will know the garlic is dried when the slices turn brittle and snap easily.
Notes
- Season – you can season the garlic with some herbs like thyme or rosemary or just a simple salt and pepper to taste.
- Uniform slices – chop the garlic uniformly to ensure each piece dries evenly. This also guarantees a consistent texture throughout your dehydrated garlic batch.
- Check for texture – test the garlic for doneness by picking a slice and snapping it in half. If it is brittle and cracks easily, your dehydrated garlic is ready. If it bends, it needs more time in the dehydrator.
- Cool before storage – allow the garlic to cool completely before storing it. This prevents condensation inside the storage container, ensuring your dried garlic remains crispy and flavorful.
Nutrition
Disclaimer
Please note that nutrient values are estimates only. Variations can occur due to product availability and manner of food preparation. Nutrition may vary based on methods of origin, preparation, freshness of ingredients, and other factors.
More Recipes Using Dehydrator
Explore delicious and healthy recipes you can make with your dehydrator. From tasty fruit snacks to crunchy veggie chips, these recipes highlight the natural goodness in every bite. Give these simple and nutritious treats a try to make clean eating both easy and delicious!


Made a batch last weekend and they turned out great! So excited to use it for pasta nights!
Exactly. Its so convenient to have a jar at home all the time.