
If you’re looking for something that’s crispy and enjoyable, these gluten-free onion rings are exactly what you need, they’re light, golden, and full of flavor with each bite. Whether you serve them as a snack, a side dish, or take one straight from the plate, they’re so crunchy and delicious that nobody will notice they’re gluten-free.
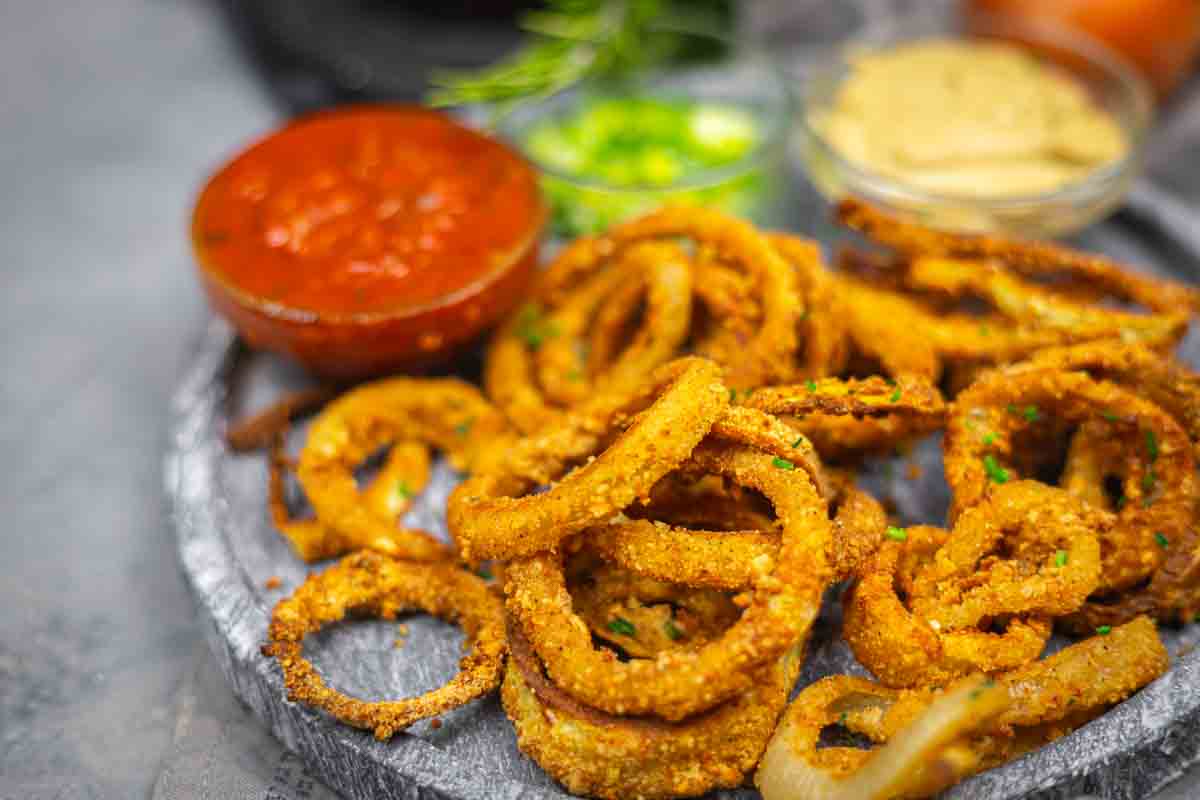
I didn’t give much thought to onion rings until one rainy afternoon when I happened to pass by a small roadside diner. The air was filled with the smell of onions crisply fried to golden perfection, so I decided on the spot to go home and make them myself. After taking just one bite of that crunchy, savory perfection, I was instantly won over before I realized it.

An Appetizer Dish
Oven-baked onion rings are ideal as an appetizer for any situation because they are simple to prepare and full of flavor, and everyone enjoys the crisp crunch. Making them gluten-free means people with dietary restrictions can enjoy them too. Serve them with dipping sauces such as BBQ sauce, buffalo ranch sauce or even orange sauce for an extra touch.
Make This Recipe for Any Occasion
At a relaxed family dinner featuring a club sandwich without buns, on a game day as a snack, or at a party, these gluten-free onion rings will always make a good impression. You can also adjust the batter with different seasonings to match your meal’s theme.
Batter or Coating
The key to that ideal crispy crunch is using a good gluten-free onion ring batter or coating. You can create a tasty coating that sticks well to each onion ring by combining almond flour, gluten-free breadcrumbs, and a little seasoning.

How To Make Gluten Free Onion Rings
Enjoy gluten-free onion rings that are crispy and golden, with a tasty and crunchy coating ideal for snacking or dipping. This simple recipe provides all the flavor of traditional onion rings without containing gluten.
Kitchen Gadgets:
- Air Fryer: A must-have for making perfectly crispy gluten-free onion rings with less oil.
- Bowl: Mix your onion rings batter and coat the onions evenly.
- Whisk: Helps to mix the dry ingredients and wet ingredients together without lumps.
- Tongs: Ideal for safely and easily flipping your onion rings during cooking.
Ingredients:
- Egg: Helps bind the breadcrumbs to the onions and gives the batter a crispy texture.
- Onions: The main ingredient is sliced into rings, which will be coated in the batter.
- Breadcrumbs: Use gluten-free breadcrumbs for that perfect crispy exterior.
- Granulated Garlic: Adds a savory depth of flavor to the onion rings.
- EVOO (Extra Virgin Olive Oil): Instead of canola oil, use EVOO oil to spray or brush the onion rings for crispness.
- Almond Flour: A gluten-free alternative to regular flour, no starch and adds texture to the batter.
- Smoked Paprika: Gives a subtle smoky flavor and vibrant color to the batter.
- Onion Powder: Enhances the onion flavor and pairs perfectly with the garlic and smoked paprika.
- Black Pepper: Adds a mild spiciness and complements the savory flavors of the onion rings.
- Salt: Enhances all the flavors, giving the onion rings that satisfying taste.
*Exact measurements are listed in the recipe card below.
FULL INSTRUCTIONS WITH STEPS FOR GLUTEN-FREE ONION RINGS
First Step: Gather Ingredients
Start by gathering all your ingredients and ensuring your air fryer is ready to go. Slice the onions into thick, uniform rings. Preheat your air fryer so it’s hot and ready once you’re done prepping.

Second Step: Prepare the Coatings
In one bowl, combine almond flour, breadcrumbs, garlic powder, onion powder, paprika, salt, and black pepper for the dry coating. In another bowl, whisk the eggs until well beaten for the wet coating. These will give your onion rings the crispy texture and savory flavor you want.

Third Step: Coat the Onion Rings
Dip each onion ring into the egg wash, making sure it’s fully coated. Then, dip it into the dry mixture, pressing gently to ensure an even coating. Repeat this process for all the onion rings, ensuring each one has both a wet and dry layer.

Fourth Step: Air Fry the Onion Rings
Preheat your air fryer to 400°Fahrenheit (200°Celsius) and lightly grease the basket with EVO oil to prevent sticking. Arrange the coated onion rings in a single layer, making sure they aren’t overcrowded for even cooking. Air fry for8 minutes, letting them crisp up and turn golden brown.

Fifth Step: Flip for Even Cooking
Using tongs, carefully flip each onion ring to ensure even crisping on both sides. Continue air frying for another 5 minutes at 400°Fahrenheit (200°Celsius) until the onion rings are perfectly crispy and golden. Remove from the air fryer and serve immediately with your favorite dipping sauce.

TRICKS AND TIPS:
- Coat the Onion Rings Well: When dipping the onion rings in the batter, make sure they are fully coated, as this ensures the perfect crisp texture. Double coating them can give them extra crunch if you prefer.
- Use Parchment Paper: If using an air fryer, line the basket with parchment paper to prevent the onion rings from sticking. This will help keep them crispy and make cleanup easier.
- Preheat Your Air Fryer: Always preheat the air fryer before cooking to ensure an even crisp on the onion rings. A quick 3-minute preheat is enough to get things started right.
- Make Sure to Space Out the Onion Rings: When placing them in the air fryer, don’t overcrowd them. Leave enough space for air to circulate around each ring, which helps them cook evenly and crisply.
- Adjust Cooking Time for Your Air Fryer Model: Depending on your air fryer’s brand and size, you might need to adjust the cooking time slightly. Keep an eye on them to get that perfect golden brown color.

FREQUENTLY ASKED QUESTIONS
What to Serve With Crispy Onion Rings?
Gluten-free crispy onion rings make an excellent side dish for many meals. They pair beautifully with green bean casserole, homemade sausage, or enchiladas. You can also serve them with shrimp, chicken poppers with zucchini, or oven-baked lamb chops.
To store gluten-free onion rings, let them cool completely first to prevent moisture buildup. Once cooled, place them in an airtight container or a resealable plastic bag. Keep them in the refrigerator for up to 2-3 days to maintain their freshness.
Can I Freeze them?
Yes, you can make it into frozen onion rings. After breading the onion rings, place them in a single layer on a baking sheet and freeze them until solid. Once frozen, transfer them to a freezer-safe bag or an airtight container and store them in the freezer for up to 2-3 months.

More Clean Eating Recipes
From quick and easy meals to satisfying snacks, there are endless ways to make delicious dishes using simple, fresh ingredients. Protein bread is a great alternative to traditional white bread, featuring a low-carb and protein-packed bread mixture.
Prepare another flexible pantry staple with dehydrated tomatoes. These dehydrated tomatoes can become tomato powder, a great substitute for tomato paste and a clean eating option for adding tomato flavor to your dishes without any additives or preservatives.
Pin For Later

Need Support or have Questions? Join our Free Facebook Group.
Follow us on Pinterest, Facebook, Instagram, TikTok, Flipboard, or YouTube.
For weekly New Recipes and a FREE E-Book get into our NEWSLETTER.
Full Recipe With a Printable Version
I would be grateful if you could give us a 5-star rating.

Gluten Free Onion Rings
Ingredients
- 1 Piece Egg
- 2 Pieces Onions
- 1/2 Cup Breadcrumbs
- 1/2 Tablespoon Granulated Garlic
- 1/2 Tablespoon EVO Oil spray
- 3 Tablespoons Almond Flour
- 1/4 Tablespoon Smoked Paprika
- 1/4 Tablespoon Onion Powder
- 1/2 teaspoon Black Pepper
- 1/2 teaspoon Salt
Video
Instructions
- Gather all ingredients, slice onions into thick rings, and preheat the air fryer so it’s hot and ready.
- Mix almond flour, breadcrumbs, garlic powder, onion powder, paprika, salt, and pepper in one bowl, and whisk eggs in another.
- Mix almond flour, breadcrumbs, garlic powder, onion powder, paprika, salt, and pepper in one bowl, and whisk eggs in another.
- Lightly grease the air fryer basket, arrange onion rings in a single layer, and air fry at 400°Fahrenheit (200°Celsius) for 8 minutes.
- Flip the onion rings and air fry for another 5 minutes until golden, crispy, and ready to serve.
Notes
- Coat the Onion Rings Well: When dipping the onion rings in the batter, make sure they are fully coated, as this ensures the perfect crisp texture. Double coating them can give them extra crunch if you prefer.
- Use Parchment Paper: If using an air fryer, line the basket with parchment paper to prevent the onion rings from sticking. This will help keep them crispy and make cleanup easier.
- Preheat Your Air Fryer: Always preheat the air fryer before cooking to ensure an even crisp on the onion rings. A quick 3-minute preheat is enough to get things started right.
- Make Sure to Space Out the Onion Rings: When placing them in the air fryer, don’t overcrowd them. Leave enough space for air to circulate around each ring, which helps them cook evenly and crisply.
- Adjust Cooking Time for Your Air Fryer Model: Depending on your air fryer’s brand and size, you might need to adjust the cooking time slightly. Keep an eye on them to get that perfect golden brown color.
Nutrition
Disclaimer
Please note that nutrient values are estimates only. Variations can occur due to product availability and manner of food preparation. Nutrition may vary based on methods of origin, preparation, freshness of ingredients, and other factors.
munch on these other snacks
Munch on these other tasty snacks that are perfect for anytime cravings. From crunchy to savory, there’s a little something for everyone to enjoy.